Everyone's birthday

Have you ever noticed the way kids always want to help the birthday boy/girl blow out the birthday candles on a cake? They crowd in and hover as close as they can get, take a deep breathe and blow all over the cake! There's no wonder they all want a piece of the action, birthdays make you feel special! So why not create that moment of magic any day of the year?

Not too long ago Joel and I baked a cake and decorated it. He insisted that it was a birthday cake, even though it wasn't his, nor mine, or anyone's birthday that day. When I asked him who's birthday it was he replied 'everyone's birthday!'

That's when the idea came to me, why not have it be a birthday cake? So with some friends, we lit the candles, sang happy birthday to everyone, and let the kids blow them out.

You should have seen those happy faces!

Zucchini chocolate chip muffins

by Vicky Here's a great kid-friendly muffin recipe that contains not only chocolate chips, but zucchini! They're great for after school snacks, or to take on playdates. I can't take credit for them though, they came from Shannon's blog 'Crafty Mom Cooks'. Check out her blog for some really great recipes the whole family will enjoy.

1 1/2 cups all-purpose flour 3/4 cup sugar 1 teaspoon baking soda 1 teaspoon ground cinnamon 1/2 teaspoon salt 1 egg, lightly beaten 1/2 cup vegetable oil 1/4 cup milk 1 tablespoon lemon juice 1 teaspoon vanilla extract 1 cup shredded zucchini 1/4 cup miniature semisweet chocolate chips 1/4 cup chopped walnuts

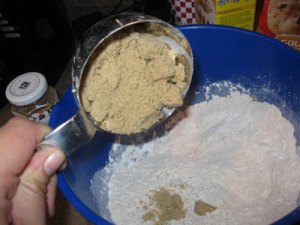
In a bowl, combine flour, sugar, baking soda, cinnamon and salt. I'm a big fan of Epicure, and I really love their cinnamon and real vanilla extract so those are the ones I used.

Also I used brown sugar, but you can use white if you prefer.

Combine the egg, oil, milk, lemon juice and vanilla; mix well and set aside. Stir into dry ingredients. Add the zucchini, chocolate chips and walnuts (which I skipped this time). I use the finest grater I have for the zucchini, which makes it disappear into the muffins, (not that I'm trying to deceive anyone).

Fill greased muffin tin. Bake at 350 degrees for 20-25 minutes or until muffins are golden brown on the top.

I was trying out my Pampered Chef muffin stone for the first time, and muffins tend to stick until it's well seasoned, which is why I used muffin cups, but you can make these without the cups. These muffins are moist and really tasty. They don't last long in our house! I'm sure I'll be making them weekly come September once Joel starts school (eep!)

(Photo courtesy of A Crafty Mom Cooks)

Have a Mommy's Night In!

by Jenn One great way of having fun with Freezer Cooking is to get together with a few friends and make a bunch of meals together.  You can each choose a recipe, agree on how many each person will make, then get together at someone house and each make your own recipe. 

 If you have 4 people who each make just 8 meals of their recipe, then each person will go home with 8 meals, 2 of each recipe!  This is a great way to try 4 new recipes without have to make all 4 recipes.  You can also just do a swap if nobody has the time to get together.  Kind of like a cookie exchange - a frozen meal exchange! 

Get the dads to get the kids out of the house on a Saturday afternoon and have fun!  Maybe even some wine for those who can!  :)

Jenn is mom to five-year old Jacob and two and a half year old Zachary. You can find her at Invitations by Jenn.

It's NOT Delissio, or delivery!

by Jenn Not long ago, it got to a point where when the door bell rang, the boys assumed it was the pizza guy.  Not good.  As well, Paul's weekend lunch was often a frozen pizza.

I started noticing how much they cost and how much it was a waste of money for not great tasting and very unhealthy pizza.  As I was researching Freezer Cooking, I discovered how easy it was to prepare and make your own Freezer Pizza's.  If you have a bread maker and a desire to cut down on your pizza costs, then keep reading!

So, what I do to make Frozen Pizzas is actually pretty simple.  First, I prepare my pizza dough in my bread maker.  Here is the recipe I use:

Bread Maker Pizza Dough Makes 3 12" pizzas

  • 1 1/2 cups beer or water
  • 1 1/2 teaspoons salt
  • 1 tablespoon sugar
  • 2 tablespoons butter or margarine
  • 4 1/4 cups white flour
  • 2 teaspoons yeast

Place ingredients in bread maker in order listed.  Set your bread maker to the dough setting and press start.  It takes my machine about 2 hours to make the dough.  If you happen to not be around when it finishes, it isn't really a big deal.  Please don't freak out if your dough rises to the point of lifting the lid of the bread maker open.  :D  All you need to do is pat it back down with floured hands.  It will be fine!

Preheat your oven to 500 F.  Divide dough into 3 equal balls.  Roll out each ball into a 12" circle and place on a pizza stone or pan.  Bake crusts for about 3 minutes.  This will par bake the crust so that it has some form to it.  Place on cooling rack once finished.  Let cool completely.

Now you have two choices.  You can either freeze the crusts and then top and cook them when you are ready to eat them, or, you can top them right away and then freeze.  I do the second option.  It makes getting dinner on the table quicker when we are home from work late.  Which ever option you choose, the next step is the same.  Tightly wrap the pizza in plastic wrap, squeezing out any air, then wrap in tin foil.  Label your pizzas and throw them in your freezer.

When you are ready to enjoy your pizza, take it out of the freezer.  Top your pizza if needed.  Preheat oven to 400 F. Bake for 10-15 minutes until crust is golden and the cheese is bubbly. Put the par baked pizza crust directly on the oven rack unless you're using a pizza stone.

Enjoy!

Jenn is mom to five-year old Jacob and two and a half year old Zachary.

Lemon cupcakes

by Brie I love cupcakes. They make me think of birthday parties.  Presents. Walking the streets of New York with a vanilla cupcake and mile high blue buttercream icing from Magnolia Bakery. Yum.

My kids like cupcakes too. Really, what isn't there to like. Cupcakes are kid sized cakes.

Baking cupcakes, and sometimes muffins that I call cupcakes, are a favorite thing to do around here. I find baking is the perfect way to fill a rainy or snowy afternoon. Especially if you get strategic about it.

I like to get the kids to do their baking in the dining room. This means we spend at least ten minutes carrying all the ingredients and tools that we need to make the cupcakes from the kitchen to the dining room. I give them one thing at a time. Maybe two spoons on one trip, but that is pushing it!

I sit my kids beside each other at the dining room table. My three-year old daughter is in charge of the bowl of wet ingredients. I even let her break the eggs. Sure I sometimes have to pick out some egg-shell, but she really enjoys it. She also really enjoys transferring ingredients like milk and oil from the measuring cup to the bowl with a teaspoon. That can take forever! My eighteen month old son gets the bowl of dry ingredients. He can spend a long time stirring and stirring the flour with a large wooden spoon.

Sometimes I make cupcakes from a box, but more often I pull out my copy of Vegan Cupcakes Take Over the World. Despite the fact that all the recipes are vegan, which are great for anyone with daily allergies, I usually use milk because I have it in the house more often than soy milk. The cupcakes from this cookbook all come up light and fluffy. And since the recipes make twelve small cupcakes I don't feel too bad eating two in one day!

Here is my modified recipe for lemon cupcakes:

1. Pre-heat oven to 350 degrees

2. Whisk one cup milk with 1 teaspoon apple cider vinegar and set aside to curdle.

3. Beat together milk mixture, 1/3 cup oil, 3/4 cup sugar and 2 teaspoons lemon extract.

4. Mix together 1 and 1/4 cups all-purpose flour, 2 tablespoons cornstarch, 3/4 teaspoon baking powder, 1/2 teaspoon baking soda and 1/4 teaspoon salt and mix together.

5. Stir the dry ingredients into the wet. (This is where the kids could start fighting so have a distraction ready. Icing works)

6. Fix a muffin pan with batter using an ice cream scoop.

7. Bake for 20 - 22 minutes. Let cool before frosting.

If I am feeling extravagant I will also whip up some icing. Just beat 2 tablespoons softened butter, 1 cup icing sugar, 1 tablespoon milk and 1/2 vanilla (or lemon extract) until smooth with an electric mixer.

The icing is easy to make and the girl will happily spend ten minutes icing all the cupcakes with a spoon.


Meanwhile, her brother will happily lick a beater.

Baking may be all about the recipe, but it is also about being creative! Creative use of time that is.

Brie is the mom of a 3.5 year old daughter "the girl" and eighteen month old son "the boy". You can read her blog at Capital Mom.