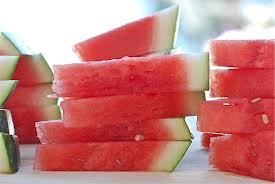
Easy Recipe for Watermelon Juice

  watermelon juiceNow that summer is finally here and we’re in for a scorcher of a week, I thought a recipe for a nice cool and refreshing summer drink was in order.

Ever since they were little, my girls have been crazy over watermelon. It’s the perfect summer food. Full of sweetness and enough water to quench any thirst. My problem, however, is that I suck at choosing a good melon. Sometimes I hit the jackpot but when my choice sucks and the girls turn up their noses at the melon, I pull out the blender and make a great watermelon juice.

Here's What You Need:

Watermelon - 1 cup chopped roughly and chilled Sugar / Honey - 1 tbsp or to taste Lemon juice - 1 tbsp or to taste Salt - a pinch (seems weird but adds a nice kick)

  1. Cut the watermelon and make sure you get all the seeds out. The best parts to use are the red, pulpy layer and cut away all the white. Chop the watermelon into pieces.
  2. In a blender, magic bullet or mixer blend the watermelon. Depending on how thick you want your juice, you can adjust the length of blending.
  3. Taste before adding sweetener, lemon juice and salt. The above amounts are just a ballpark but it depends on your preferences.
  4. Refrigerate the juice for a little while to cool it but not too long as it will start to separate. Don’t add any water since the watermelon already has enough water content in it.

That’s all there is too it. It takes no time at all to make and is great on a hot summer’s day. And...after the kiddies go to sleep, you can always add a little “mommy juice!”

 

Ottawa's Farmer's Markets

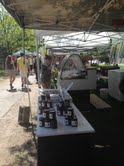
0-1One of the best parts of Ottawa in the summer is the availability of fresh produce grown locally. Last weekend, my girls and I had the opportunity to visit the Westboro Farmer’s Market to get some veggies and breads for dinner. Since the arrival of summer, the Farmer’s Markets are popping up all over Ottawa, in every part of the city. Not only are they a great resource for those who want to support our local infrastructure, but they are a fun way to get your kids involved in making (and actually eating) dinner.

0-2If I’m honest with myself, I have to admit I have the world's pickiest eaters. Both are self-proclaimed vegetable haters. So, in order to help the situation, I told them that they could each pick and prepare a dish with their (ahem) favorite veggies. My eldest grabbed some asparagus (all the while laughing because it would make our pee smell). My youngest latched onto the zucchini. At first, she wanted to make fried zucchini but later settled on “baked” fried zucchini. A good compromise I thought.

We had a blast inspecting, choosing and then buying our dinner. Not only did they have fresh vegetables, baked goods and fruits but they also had crafts, treats and pottery, flowers and more. It was a great way to spend an afternoon.

The Ottawa Farmer’s Market in Westboro is located along the walking path of the Byron Linear Park, between Golden, Richmond and Byron Avenues and there are more than 65 vendors. It runs on Saturdays from 9:30-3:00. you can also find more Farmer’s Markets around the city on their website.

Do you shop at an Ottawa Farmer's Market? Which one is your favorite?

Super Bowl Sunday

I don’t know about you but I’m not really a football fan. In fact, watching football kind of makes me want to gag. So it really was a surprise to me when my girls decided they wanted to have a Superbowl party.  To me, it means that I’ll actually have to tune into the game - at least enough to know when it’s okay to serve food! It did take some convincing on their part but we decided to go ahead with it. We’ve invited a few family friends over to help us watch the Baltimore Ravens take on the San Francisco 49ers in Super Bowl XLVII Sunday night. While my girls think it may be just about watching the game, I thought that I’d plan a few activities to keep the younger kids entertained and some great food ideas to keep the adults happy and fed. We have some younger guests coming so I came up with two really easy crafts that will, hopefully, keep them occupied:

Super Bowl Craft Ideas

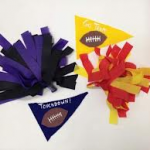
Pom Pom Craft:

Cut 24 pieces of party streamers (12 in each color) into 2-foot strips. Spread the strips out in a circle. Gather in the middle and twist to make a handle. Wrap tape around the handle to secure, then cheer for your team.

Pennant Craft:

Have some felt pieces in brown and the team colours. Cut one piece of felt into a large triangle. Cut brown felt into the shape of a football. Glue football to triangle and decorate with puffy paint.

For food, we decided on standard fare, like pizza, wings and munchies but my girls, for some reason, are in love with the idea of pigs in a blanket so pre-game we’ll be stuffing those piggies. There are likely a lot of ways to make them but this way has always worked for me:

Pigs in a Blanket

For the meat filling, you can use regular hotdogs, little cocktail wieners, all beef or veggie dogs. Really anything will work.  A can of crescent roll dough or biscuit dough will be the “blanket.” Preheat oven according to the dough directions. Separate the uncooked crescent rolls or biscuits. Roll the pieces of meat in the dough and bake according to the dough directions.

Pigs in a Blanket

For the older kids (and adults who aren’t into football), we’ll put out some board games and set up the Wii or Playstation. With lots of food, drink and activities, hopefully this Super Bowl party will be a hit, even for people like me who didn’t  know who was playing until my girls told me.

What are you doing for Super Bowl Sunday?

Fall tye-dye cupcakes

by Carly

I really wanted to make something nut-free for the Little Man to eat for dessert at our Thanksgiving dinner tomorrow.  Since I knew the pie I was bringing had nuts, I decided to make some fall-themed cupcakes.  I didn't have time to fuss with fondant, creating fancy turkeys or pilgrim's hats (not that we really do the pilgrim thing here in Canada anyway).

Since Jake really likes rainbow coloured cakes and cupcakes, I used that as my jumping off point.  We made white cake batter, then divided the batter into three bowls.  One bowl of batter was tinted yellow, one orange and one terra-cotta (I'd run out of red but had terra-cotta lying around for some reason).  I used food paste as you need less of it to get a nice strong colour.

To make it easier to get the batter into the cupcake liners, I put it in plastic baggies and snip a tiny bit off one corner.  I started with the lightest colour, pouring some into each cup.  Then we added the orange and finally the terra-cotta.  Don't mix the colours as the batter will turn out muddy - just leave them "piled" on top of one another.

While the cupcakes were baking in their plain white cupcake liners, I nosed around our cupboards looking for some pretty fall-themed liners to put them in for added colour, but I came up empty handed.  So I tinted some extra white liners I had with yellow, orange and terra-cotta food paste mixed with water.  Using a spoon I poured the different colours over the liners while they sat upside down on a wire rack nestled in a rimmed cookie sheet to catch the run-off.

I didn't want to completely cover the liners, so I left a fair bit of white showing.  When I had tinted all the liners, I poured any excess dye off them, then put them right side up in a cupcake pan.  After taking out the baked cupcakes, I turned the oven off and put the liners into the warm oven to help them dry.  Keep a close eye on them - they only need a minute or two.  The bottoms were still damp, so I turned them upside down on the wire rack and popped them back into the still warm oven for another minute or two.

While the cupcakes cooled I made some buttercream frosting and divided that into three bowls.  I coloured each bowl using the same colours I'd used in the batter.  Each colour was then put into it's own individual piping bag and twisted closed at the top using a twist-tie.  I loosely attached the three bags together around the middle using a pipe cleaner, and put all three into another piping bag with my largest round tip attached.

I did a test swirl on a plate to make sure the three colours would come out nicely and fairly uniform, then piped the cooled cupcakes, starting at the outer edge and moving toward the middle.

Ta-da!  Tye-dyed cupcakes with tye-dyed frosting and tye-dyed decorative liners.

Carly has red hair and occasionally the temper to match.  She loves potatoes, rainy nights, photography, her husband, her 6 year old son, Jacob and her 10 month old son, Noah.  Probably in reverse order.   She also blogs.

Flashback: OAMC, or simply put, Freezer Cooking

This was one of our very first posts on the blog but I've been thinking about it a lot lately as I try to figure out how to not only avoid takeout by being more efficient but also figuring out ways to save money on groceries. ~Lara by Jenn

I am very happy to write my first post as a contributor to this Blog!  I really believe that this blog will be a great way to help other parents in the Ottawa area in many, many ways!  I am not very good with figuring out new things to do with my kids (Jacob - 5, Zachary - 2.5), but I realized today that I do have something important to share.  Once a Month Cooking, also called Freezer Cooking.

Over the past 4 years since going back to work after my first child, I have struggled with getting proper, healthy meals on the table after getting home for the day after 5pm.   Then, last October, a friend posted something on Facebook about a place you could go to where you choose a certain amount of meals and then prepare those meals right there at the store.  They provide everything you need and have everything all ready to go.  You just have to follow a recipe and dump ingredients into Ziplock bags.  It sounded great!  I decided to give it a try.  It was a lot of fun, but it was also pretty expensive.  I justified it by convincing myself that we would end up saving money by not going out to eat. I thought I would just go once a month and make 6-9 meals.  Shortly after, I realized that we would not be able to do this regularly.  The cost was just too high.

Skip forward to February.  A different friend posted on Facebook how she had just made 12 meals in one day.  I immediately drilled her on how she did this.  It was that day that I was introduced to Once a Month Cooking / Freezer Cooking.  She suggested two books for me to have a look at - The Big Cook and Fix, Freeze, Feast.  I researched both books and decide I needed both of them ASAP!   So I ordered them online from Chapters.ca.  The day they were delivered, I went crazy planning my menu for the next little while, preparing a grocery list, and ultimately went shopping at Costco and Bulk Barn for my ingredients.  That first night, I had prepared 3 meals of Basil Balsamic Chicken Breasts.  It took me no more than 15 minutes of work.  We had one that night and two more went into the freezer.  I went about three days in a row doing this and then spent a Saturday afternoon making about 8 meals.  It was great!  I had 12 meals in the freezer ready to go.  All I needed to do was put it in the fridge to thaw in the morning or night before and I had dinner figured out.

Freezer cooking is not only a great way to plan meals and have something ready for dinner every night, it is also a great way to save money.  If you are a Costco shopper, this is definitely a great thing to do.  You can buy big trays of meat and use it all at once to make many meals and not be afraid of wasting.  You can watch for sales and save even more money.  I tell you, once you start, you can become a little obsessed with it!  I started seeing meat and thinking "What can I make with this".  By the beginning of March, my freezer was packed with about 30 meals.  :)  Obsessed I was!  But we have been eating GREAT food and I have been saving us money!  Win, win!

Stay tuned for more adventures in Freezer Cooking!

Jenn is mom to five-year old Jacob and two and a half year old Zachary.

Have you ever tried once a month cooking? Do you have any tips to share?