Spring's here. Planting time.
/by Alanna
Do you smell that?? Ahhh the sweet smell of spring. "Yuck, it stinks" is the reply I get from my two darlings. Yes, they are right. That smell of mold and mud isn't really that yummy a smell, but to me it is sooooooooo beautiful. Those that know me know that I am not really a winter person, but boy oh boy, come spring there is a bounce in my step and a long lost smile on my face. That smell means longer days, sunny days and that defrosting mud, well, that means gardening. Yippee.
There is something so wonderful about gardening with children. No matter how small or old they are, everyone can find something to like about gardening. After years of working with children I found that it is the one activity that everyone gathered around to participate in. My children are no different. Over the past couple of years we have started our seeds at this time of year. I can remember my father sitting at the dinning room table sorting seeds and meticulously placing them in a wet paper towel to get the started and then, once they root, transplanting them to some nutrient rich soil. It is this type of fondness that I want to instill in my children.
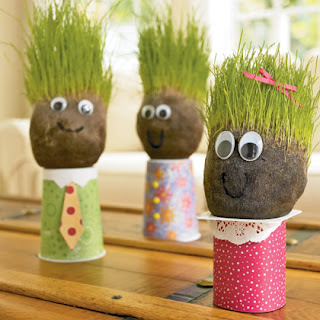
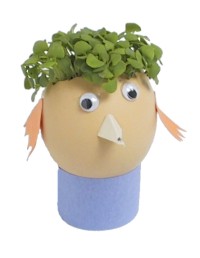
From watering the plants in the house, to picking out seeds from the seed catalogue, my children are eager to help. This year I have something different in store. Usually we plant the seed in that black container with the clear plastic lid that acts as a greenhouse of sorts. Somehow it is lacking, not enough excitement if you know what I mean. This year, however, I think we will knock it up a level and plant in different containers. Even though they have already picked out their favourite seeds (watermelon, pumpkin and cantaloupe) we will start with some easier and faster growing seeds. It will work better in our orange peels, yogurt containers and egg shells. Once we get these seeds growing away, we can then just plant them along with the planters in the ground (except the yogurt containers), but of course before we do that we need to draw on some faces.
We don't have a lawn, so grass seed is just what we need right now. We also are starting lettuce in orange halves, but we haven't gotten any pictures yet. These can go right into the ground once they are started. All you have to do is temper them outside for a day or two and they can go outside quite early. Both the grass and the lettuce are excellent choices for children. They grow rapidly and are very simple to take care of. With the grass they can actually cut the grass with scissors and watch it grow back. You know, give it a hair cut. Now what could be more fun than that?
A word of caution - make sure that the eggshells are well cleaned out before the children handle them. You can even put them in the oven to burn off any of the excess residue. Once this is done, they are safe to use. You can also put them in 1/3 of toilet paper roll to hold them stable.
Have fun starting your seeds, Remember, getting dirty is part of the fun.
Alanna is a mother of two beauties, Nora age 3 (aka coconut) and Avery 5 (aka polka dot). Former ECE turned mother, party planner and blogger. Never a dull moment around this house.


