Recipe: J's French Toast

by AmandaY My 5 y.o. son is a picky eater.  I admit this freely and try to accommodate his preferences and introduce new things slowly but surely. (last week we had a breakthrough with pineapple!)  He has issues with smell, texture, colour, and must know every detail about what it is that he's eating.  I do strive to feed him food that he likes however.

This is my own recipe for French Toast.  I don't own the copyright or anything but it's the balance of flavour that I enjoy and he will eat and then ask for more!  That's all a parent really wants, is to see their kids eat!  I love to make this on weekends when we have time to cook in the kitchen together.  He's an expert mixer, soon he'll be ready to learn to crack the eggs!  His favourite part is the eating, and really can you blame him??

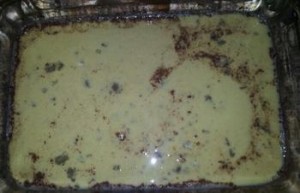
5 eggs 1/4 cup of milk 1 tsp vanilla 1 tsp cinnamon 1/4 tsp nutmeg 6-8 slices whole wheat bread (at least day old works best) 1-2 tbsp vegetable oil

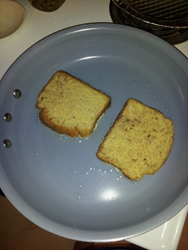
The key to this recipe is to preheat your pan then lower the temperature to about medium or slightly lower.  Don't crowd the pan, I use a fairly large skillet and only two slices at a time.  Halfway through, add some fresh oil.

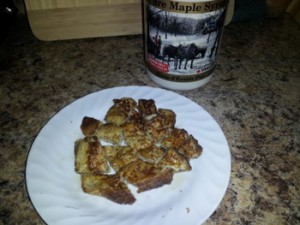
Serve with *real* maple syrup and your choice of fruit!  My picky eater likes bananas, but they can't be on the same plate as the toast.  :)

Amanda was born and raised in Ottawa where she continues to live with her husband and son “J”. Amanda is bilingual and interests include reading, blogging, socializing, and advocacy on children and teen issues.

Enhanced by Zemanta

Kid in the Kitchen

by Amy When I was a kid, my sister and I used to go over to a friend's house and her dad would gather us in the kitchen and we would make bread. I don't remember exactly how involved we were in the pre-dough stage, but we got to make our bread into shapes and then he would bake them and we would eat them. I knew when my kid started being able to help out in the kitchen – and being very excited to help out – that bread was going to be one of our projects.

Today she was looking for something to do and I decided it might be the right day. I found a recipe online (from Jamie Oliver) and we went out to get our ingredients.

When we got back into the kitchen she was a little impatient as I read through the recipe and figured things out, but once we got started she got her hands right in.

It was a little messy:

...But once it was time to knead the dough, she knew exactly what to do.

The problem with making bread is that you have to let it rise twice, so instead of just mixing, baking and then eating, there is a bit more of a wait, but we got through that extra time with a bit of a dance party.

Eventually the bread came out of the oven.

It smelled like bread and it looked like bread, but we had to taste:

I think she approved.

(And while we had all the ingredients out, and since we had bought yeast, we made some baked doughnuts too...

Amy is mom to two year old Maggie and a 6 year old schnauzer named Henry. You can read her blog at amyboughner.ca where she writes about motherhood and anything else that’s on her mind. She also shares a blog with her husband at boughner.ca where they talk together about parenting a daughter.


Enhanced by Zemanta

Going Bananas Over Allergy-Free Desserts (egg/dairy/nut/sesame/soy/wheat/gluten-free)

by Meghan Allergy-free and kid-friendly can pose a real challenge in the food department. When it comes to kid-friendly and allergy-free desserts the choices are limited unless you want to spend a lot of time in the kitchen. Allergy-free baking can be tricky (as with regular baking) and a lot of moms want easy – not everyone is a Martha Stewart.

It is difficult to find easy pre-made allergy-free desserts as they usually cater to only one food allergy or they are ridiculously expensive. I remember bringing home a $30 allergy-free cake to treat my family only to have my 3-year-old exclaim it looked yucky and the baby toss it on the floor.

When you want to treat your little ones and you don’t want all the mess/work, I say grab a banana. I live with a bunch of monkeys, so bananas do not last in the fruit bowl. I end up making a second trip to the grocery store to replenish what was eaten. Even the pickiest of eaters seem to be okay with a banana, so why not make a quick dessert from it? You can even get your picky eater involved!

Now you may wonder how a simple banana could be transformed into an easy dessert without just looking like a boring banana – “yippee mom, bananas again for dessert”.

Here are 5 ways to get your kids going bananas for these banana inspired allergy-free desserts:

Banana Sushi

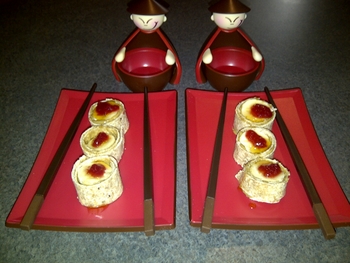
As adults, we just love to use chopsticks even though we could take the simple route and grab a fork. My oldest daughter is fascinated by chopsticks, but wouldn’t touch real sushi. When she saw that I was rolling up some bananas for dessert, she was ready to use those chopsticks.

Directions: Slice 1.5 inch wide strips of a tortilla wrap. Spread sunflower seed butter (I use SunButter) on one side of the strip. Slice 1.5 inch piece of banana and place on one end of the buttered strip. You are then going to roll the banana into the strip. I topped each of the rolls with a little bit of raspberry jam to mimic fish eggs on real sushi.

Banana Boat

Why dirty a bowl when you have a banana?

Directions: Carve out lengthwise the top of the banana. Take a spoon and scrape out some of the banana and place in a bowl (you want to create a partially hollowed cavity in the banana). Mix 1 tbsp of brown sugar, 2 tbsp of oats, and 1 tsp of butter spread (I use Earth Balance – vegan) into the bowl with banana. Mash all together and place back into hollow cavity of banana. Top with dairy-free chocolate chips (I use Enjoy Life brand). Place in oven for 10 minutes at 375F (you can make a little stand from aluminum foil). Banana skin will turn a bit black, but insides will be all warm and gooey.

Banana Sundae

A simple summer treat!

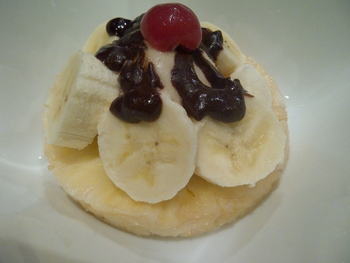
Directions: Slice a pineapple and place ring at bottom of bowl. Place one scoop of sorbet in the middle of pineapple ring. Slice banana and layer around sorbet. Melt a few tbsps of dairy-free chocolate chips (I use Enjoy Life brand) with one tbsp of rice milk (or any other choice of milk) in microwave – stir. Pour chocolate sauce over sorbet and bananas. Top with a cherry.

Banana Chocolate Fondue

Kids love to get involved and decorate.

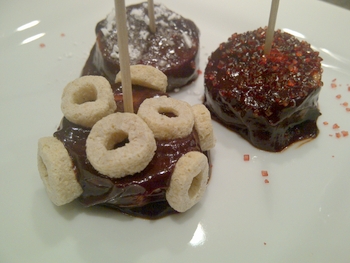
Directions: Slice bananas in 2 inch pieces. Melt dairy-free chocolate chips (I use Enjoy Life brand) with rice milk (or any other choice of milk) in microwave – stir (1 tbsp of milk for every 3 tbsp of chocolate). Dip banana pieces into melted chocolate and place on plate. Put toothpick in top of banana piece. Let kids decorate with sprinkles or cereal.

Banana Fruit Stick

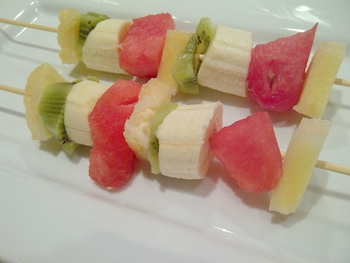
The easiest and healthiest of all desserts, but children just love anything on a stick! My daughter wouldn’t touch kiwi, but since I put it on a stick next to the bananas, she didn’t make any mention of hating it.

Directions: Cut up bananas, watermelon, kiwi, pineapple, or any other fruit on hand and place on a skewer.

Meghan is the mother of 2 beautiful girls aged 1 and 3. She has been recently diagnosed with Ankylosing Spondylitis which is a form of arthritis. In the process she has discovered that diet severely influences her symptoms as she is intolerant to dairy, gluten, eggs, and corn. She blogs about her daily challenges with dietary restrictions at Bon Appetit Allergy Free Treats and you can also follow her on Twitter .

Recipe: Slow cooker chili

by Becky (from Momstown Ottawa) On those busy days there isn't anything better than having supper taken care of. When it's 4 pm and I forgot to take something out of the freezer for supper, or simply don't have the energy to decide what to make, it can be a resentful and stressful time.

For me, my slow cooker is a supper saver some nights. I'm able to prepare it when the kids are happy (or at school) earlier in the day, and it's ready when we want to eat, or when my husband gets home from work. No matter how busy we've been in between.

Have a favourite slow cooker recipe? Share it in the comments! Below is my recipe for beef chili. It's a family crowd pleaser (also a go-to when we have a group of people over!)

______

This recipe isn’t a hot chili – so feel free to add more tobasco if you prefer extra heat. However, it is very garlicky which we love!

If you are a new cook, this is an easy, family pleasing meal. Enjoy!

Ingredients:

-Extra lean ground beef (or turkey) – about 1 package (2 pounds)

-4 cups crushed tomatoes (I use 2 large cans)

-2 cans red kidney beans, drained

-1-2 pepper(s) chopped

-2 cups mushrooms, sliced or chopped

-1 chopped onion

-6 cloves crushed, fresh garlic

-2-3 tablespoons chili powder

-3 dashes tobasco sauce

Directions:

1-In frying pan or wok, cook meat. When cooked, add garlic, onions, peppers and mushrooms. Let cook until onions start to get tender and translucent. (Note: In a pinch for time? Just cook the meat and add the raw veggies directly into the crock pot as in step 2. Cooking the veggies and garlic makes more of the yummy flavours come out, but isn’t a must.)

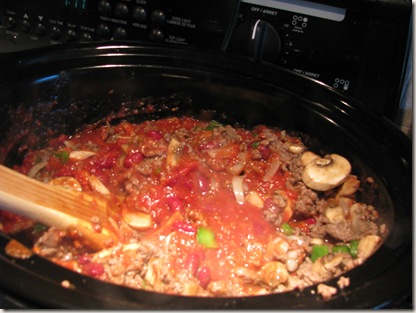
IMG_5708

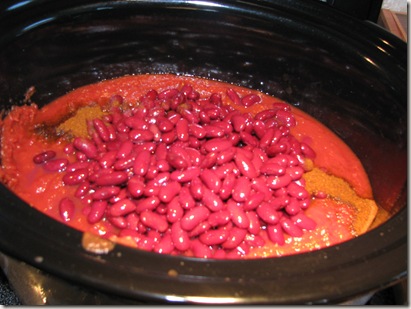
2-In the crockpot, add tomatoes, beans, chili powder and tobasco sauce.

IMG_5709

3-Add meat mixture to the crock pot.

IMG_5710

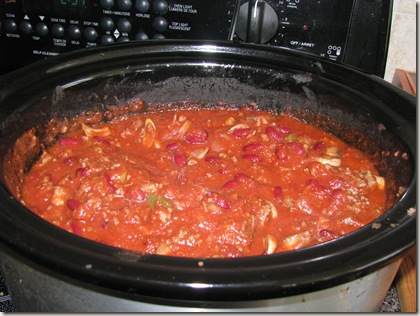
4-Simmer on low for 5-6 hours, or on high for 3-4.

IMG_5712

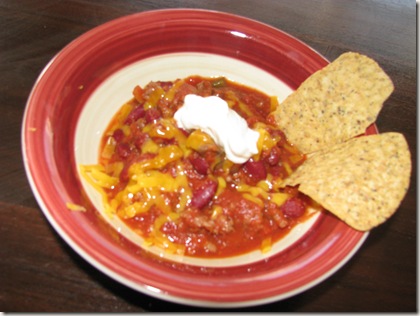
5-Serve with your favourite fresh bread, garlic bread, or with nacho chips and sour cream (my favourite way! You don’t even need a spoon. And note: the 2 measly chips in the picture below are for show only. I eat half the bag with it…)

IMG_5716

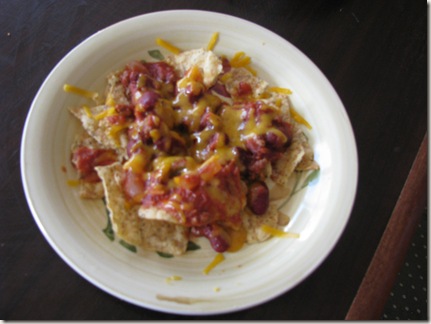
For leftovers (or for my son!) I make a plate of nachos, baked in the oven with melted cheese on top. My son gets his like this because, while he will eat a bowl of chili, if the nachos are available he’ll just eat those. This way, to get to the nachos, he has to also eat the chili.

IMG_5714

originally posted on www.bitofmomsense.com

Still looking for more slow cooker recipes? Try these from momstown meals:

Slow Cooker Spiced Apple Chicken

Slow Cooker Indian Cauliflower

Slow Cooker Bean Soup

momstown is for neighbourhood moms wanting to connect for support, conversation and  fun.  We are currently looking to expand into Ottawa and are seeking an entrepreneurial mom who might be ready to start an exciting new career!  For updates and information visit our momstown Ottawa blog.

Enhanced by Zemanta

Valentine's Day Dinner

by Carly
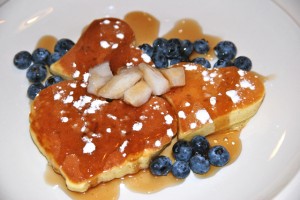
We love to celebrate Valentine's Day with a nice family dinner.  We set the table with our nicest dishes, keeping to a red and white theme.  Jake loves shaped pancakes so I had fun making heart-shaped ones for our special dinner.
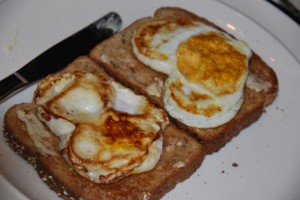
I had a few heart-shaped cookie cutters laying around, so after mixing my pancake batter and pre-heating the pan, I sprayed the cookie cutters with cooking oil and placed them in the pan.  Add the batter, be careful not to overfill the cutters.  When the pancake starts to bubble, use a pair of tongs to remove the cookie cutter from the pan.  You may need to gently cut around the edge of the cutter with a knife to loosen the pancake first.  Once the cookie cutter is removed, flip the pancake and cook it on the other side.  Be sure to re-spray the cookie cutters with cooking oil before using them for the next pancake.
 
Since my husband isn't big on pancakes, I made him some heart shaped eggs, using the same method.
 
Topped with maple syrup, some powdered sugar and homemade fruit salad, our pancakes made with a lot of love were a big hit!
Carly has red hair and occasionally the temper to match.  She loves potatoes, rainy nights, photography, her husband and her 5 year old son, Jacob.  Probably in reverse order.   She also blogs.
Enhanced by Zemanta