Water Safety Tips with KidsCanSwim Canada

Drowning can happen very quickly. Families and caregivers play a vital role in teaching kids to learn to swim and behave safely in and around water. Joining us on the blog today is locally-owned swim school, KidsCanSwim Canada.

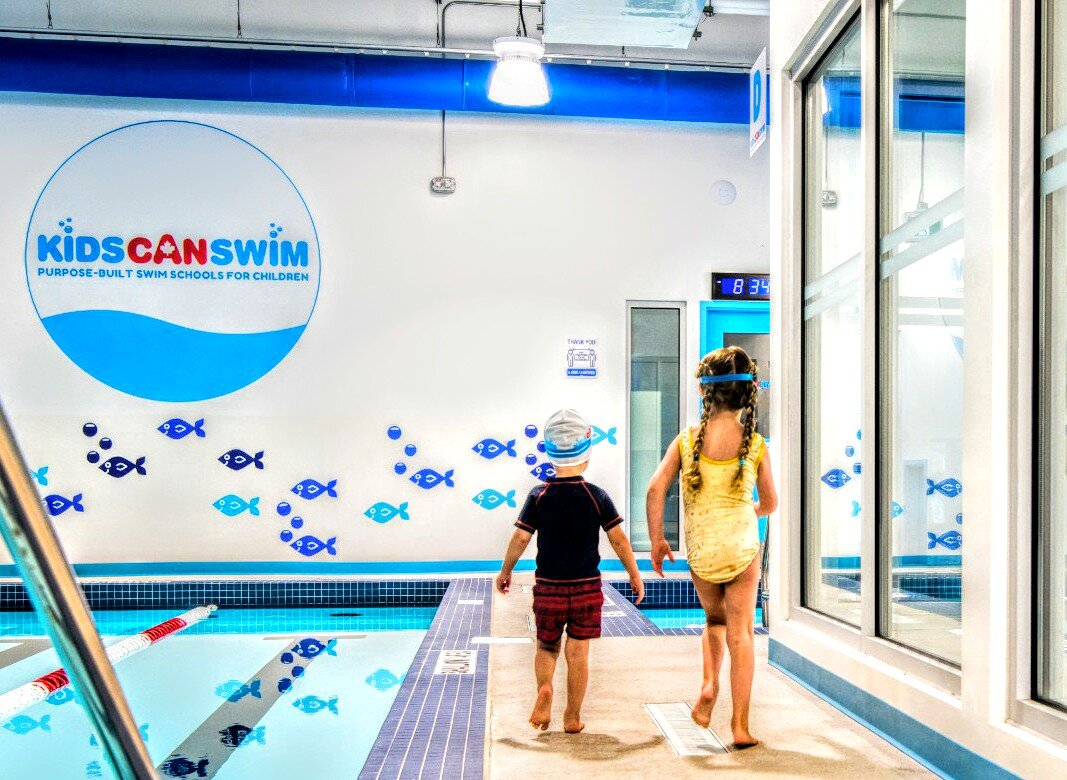
Located in Ottawa’s West End, KidsCanSwim boutique facility specializes in small class sizes and science-based learning. Their personalized approach, sparkling clean pools, and commitment to delivering an exceptional experience to you and your child makes for an enjoyable swimming lesson for all. AND you don’t have to worry about cold water! Their pool is a constant 32°C warm, with UV-filtered water and sparkling clean change rooms.

We asked the team at KidsCanSwim to share with us some important tips that everyone should be familiar with when it comes to water safety:

Never swim alone

Consider bringing a buddy or two with you while you swim. If someone gets in trouble the other can call for help! Never grab on to your buddy to save them, use a rescue aid such as a lifejacket or a noodle to reach for them from a safe stable distance.

Always wear a lifejacket or PFD

This applies to more than just boating! Any sort of activity where there is a risk of falling in the water either from a great height or a great speed is a major risk for even the best of swimmers. Did you know there is a difference between lifejackets and PFD’s? A lifejacket is an emergency device designed to keep its occupants head upright and provide buoyancy while a PFD (Personal Floatation Device) is simply designed for buoyancy. When choosing your lifejacket or PFD consider a bright colour so you can stand out in a body of water.

Take swimming lessons

While this might be obvious, swimming lessons are a very powerful defence against accidental drownings. Consider a program such as KidsCanSwim that will focus on fast progression of swimmer’s swimming abilities and water safety elements.

Take a lifesaving course

If you are passionate about water and want to learn lifesaving skills that can be applied in everyday life consider registering for a bronze medallion or bronze cross course. These courses are specifically designed to equip candidates with skills to perform various rescues in a variety of different scenarios. First aid courses are also an option, they are short and provide a wide variety of tools for anyone!

Watch your kids while swimming

The majority of accidental drownings happen when kids are swimming unsupervised and an accidental drowning can happen in as little as 30 seconds or roughly 2 Instagram stories. Always watch your kids when they are swimming,  even when there are lifeguards around. Lifeguards are there to respond in emergency situations – you are always responsible for your child’s safety in and around water.

To keep your kids safe around the water visit KidsCanSwim’s website and register for one of their private or semi-private classes, which have recently re-opened with safety measures in place to keep families safe.  Find out more by visiting them online at https://www.kidscanswimcanada.ca, and follow them on Facebook and Instagram!

Disclosure: This is a paid, sponsored blog post with KidsCanSwim.

Paint a triangle mural (quarantine wall)

trianglemural.png


This quarantine my daughter and I were inspired by some TikTok videos to create some murals in our house. We created one in my office for a video backdrop and another in her bedroom. This is a simple (but time consuming) mural that was a great project to take on with my 11 year old daughter. I pieced together the steps by seeing what others were doing in videos so this may not be the BEST way, but it’s my way :)

What you’ll need:

  • 4 paint colours

  • A large paint roller

  • Painting tape

  • Paint brushes

  • Drop cloth

  • Step stool

Step 1:

Pick 4 paint colours - 3 for the triangles and one base colour for the strips between the triangles. If you like the current colour of your wall you can have that be your fourth colour and skip steps 2 and 4 but will have to be more careful when you get to step 6. My daughter and I both chose to paint our walls white and then picked three other colours for the pops of triangle we wanted. I picked a cream colour that ended up being VERY pale and not terribly distinguishable from the white so you may want to double check how the colours lay next to each other before committing.

Start by painting the wall your base colour - we used white

Start by painting the wall your base colour - we used white

Step 2:

Lay out your drop cloth (this was my kid’s first wall painting efforts and I’ve never seen as much paint land on the drop cloth so cover carefully) and tape the side walls, ceiling and baseboards.

Paint the wall your base colour (this is the only time you’ll need a large paint roller). You don’t need to be super careful here because you’re going to be covering most of it, but you will want it to be covered evenly. We used a cheap leftover can of paint we found in the basement for my office and it took two coats of white to cover the brown that was there before.

Step 3:

Tape your triangles

Tape your triangles

Start taping your triangles. There are no rules here but only a few suggestions:

  • Don’t make too many SMALL triangles, that will get fiddly (there were quite a lot of small triangles in the first room we did and less in the second - check out the images of both at the end to see which you prefer!)

  • Make a few LARGE triangles for effect.

  • Double check that all the taping has been done straight to avoid wobbly triangles (kids can pick the triangle shapes but adults may want to go and straighten the lines up.)

Not having a plan can stress some people out so just try to go with the flow and know that you can always un-tape and re-tape anything you don’t like later. It’s ok if some shapes aren’t perfectly triangular.

Step 4:

To avoid too many colours touching each other we pre-planed what colour would go where by writing a 1, 2, or 3 in each triangle. You may have some where the same colour touch and that’s OK too but pre-planning a bit here will give you a plan to follow. I had my husband do this part because I would have winged it - he enjoyed planning out how to have the least amount of repeating colours. This, in my opinion, is an optional step. Write the number lightly in pencil right on the wall - we put the number on the tape and we accidentally painted over some of them.

painting the tape.jpg

Step 5:

You can skip this step if you used the original wall colour and you can also skip this step if you’re confident you can paint carefully.

Paint the base colour of all the edges of the tape. This means that we’re creating a barrier to stop the brighter colours from leaking underneath the tape, and if anything does leak it’s the same colour as the base colour. We had very little paint seeping through so it seemed to work well for us!

painting the triangles.jpg

Step 6:

Start painting in your triangles!

We used a foam roller on the first wall but I actually found it easier to just stick to paint brushes for this project. It may take several coats depending on how well the paint covers.

We painted all the triangle colours and then would wait for them all to dry and then do another coat again the next day. This is the longest part but it’s really fun to see all the colours come together on the wall!

My daughter wasn’t quite tall enough to do the top ceiling edges so I took care of those but she was able to do the rest!

You may end up with some drips and messes but they were all easy to cover up later and it was a great way for my daughter to practice her painting skills!

Step 7:

This is the most satisfying step! Peeling all the tape off!

And that’s the triangle wall. They’ve created some fabulously cheerful backdrops in our house and they’re fun to paint too - a fun project for a summer when we’re all spending more time at home! Check out the video below I made that went up on Tiktok to see us doing the whole process on the first wall.

Finished pink wall

Finished pink wall


Expert Interview on homeschooling: Stephanie Sewell, educational consultant

Stephanie Sewell is an independent education consultant, writer, speaker, children's choir director, and workshop facilitator and I invited her to join me for this 30 minute interview to chat about many of the topics that I know are on parents’ minds at the moment.

We covered:

  • structure and rhythms and routines

  • what education can look like when it isn’t school

  • how to stay connected to your school board if you know your child will be returning when possible to a traditional school system

  • how to build community and connection in a different way than you’ve been used to

  • how kids learn as part of their regular days and routines

  • learning pods

Check out Stephanie’s web site and Facebook page to find out more about the services she provides if you’re looking for support as you try to figure out your best plan moving forward for September.

Dino Dana the Movie {Giveaway!}

This past weekend we got a chance to check out the new Dino Dana movie and we’re excited to be offering one family a chance to win a special screening!

dinodana_movieposter-Cineplex-socialcrop.jpg

If you haven’t already seen it, Dino Dana is a series on TVO Kids targeted for K - 2 aged children.

Dino Dana The Movie finds 10-year-old Dana, who sees dinosaurs in the real world, completing an experiment that asks where all the kid dinosaurs are. To find the answer, Dana, her older sister Sara, and their new neighbours Mateo and Jadiel go on a dinosaur journey bigger than anything Dana has ever faced before.

There are also some fun downloadable activities to accompany the movie. You can find these activities through the Dino Dana The Movie website, under the ‘EXTRAS’ tab. There you will find a:

  • Downloadable Watch Kit: this includes, cut out dino masks, a dino cookie recipe and other DIY crafts for a fun movie night in!

  • Movie Activity Book: Crossword puzzles, connect the dots, tons of interesting dino facts and more!

  • Paleontologist-In-Training Certificate: Become an official paleontologist-in-training just like Dana! Just type in your name and print it out.

Movie Review from my kids

I watched this with my 7 and 10 year-old. I was wondering if the movie was too young for them, but thought the 7 year-old would enjoy it. Plus, we’re huge Odd Squad fans, and this movie comes from the makers of the Odd Squad movie (Miss O makes an appearance as a character!) However, they both liked it! Here’s what the 10 year-old had to say:

I rate Dino Dana a 5 star out of 5 because it was more about coming together than dinosaurs. My favourite part was the ending - you’ll have to watch to find out what happens!

Currently, Dino Dana The Movie is available for download to rent or download to own through the Cineplex Store. We’re giving one lucky family the chance to watch the movie free of charge! Please note: you will need to sign up for a Cineplex account, and then you will use the code at checkout. Offer valid to watch before August 31st, 2020.

TO ENTER: LEAVE A COMMENT, AND TELL US WHETHER YOUR CHILD HAS A FAVOURITE DINOSAUR AND WHAT IT IS! (when entering your comment, don’t forget to leave your email address - this is ONLY visible to us admins, and not the general public!) Winner will be chosen Monday August 3rd at 8 p.m.

Marked Ultimate Adventure Park

Today’s post was written by 11 year old Juliette!

marked_entrance.jpg

On July 17 we entered stage 3 of reopening. It can be pretty difficult to find activities to do with your kids during these weird times. So we’re here to give you ideas!

This weekend my family and I got the chance to visit MARKED Ultimate Family Adventure Park. We were pumped to go because we figured it  would be a great way to get some exercise since we’ve been stuck inside for so long…plus, it's outside! Here's how it went…

Where is it

Marked is located on Highway 7 just past Carleton Place.

Cost

marked_familywall.jpg

The obstacle course costs $10 for kids aged 7-14 and $15 for adults. They also have a season’s pass for the obstacle course for $200 if you want to keep coming back and mastering all the obstacles.

In non-Covid times they have day passes that give you access to many of their activities for $45 - $250 depending on age or for a whole family.

Covid-19 safety

The obstacle course was entirely outside and once we started the activity we never came close to any other people, making it feel very safe. At registration my mother wore a mask when she went inside, there were clear lanes to keep people organized, and staff remained behind a plexiglass shield. Waivers were all signed electronically before we arrived.


What I liked

markedobstacle1.jpg

What  I liked about Marked were all the fun obstacles. The hardest thing was the Bowser’s castle. It was where you had to climb stairs backwards with your arms and then swing onto a ring and climb another backward set of stairs. It was soooo hard! No one in my family could do it but we laughed a lot.

One of my favourite obstacles was the rope climb. It was a diagonal wall with a rope attached at the top. You had to grab the rope and walk up the wall while pulling yourself along - it was super fun! There were even walls to climb over! Some were small and some were big. 

Check out this video we made for Tiktok from our day out.

Forest trail

forest obstacle.JPG

At the end of the obstacle course there's a beautiful trail you can walk down with some obstacles along the way. We went down it and had lots of fun, but it's a very long walk (5-6 KMs) so make sure you're up for it. Some of my favourite obstacles on the trail were the barrels, the log carry, the seesaw, and the tires. The barrels are two barrels that you have to go through on your stomach. The log carry is near the end and it's where you have to pick up one of the logs at the start and carry it around a small track. The seesaw and tires are a seesaw that you have to walk across then you have to walk through tires and walk across another seesaw.

WATER!

Make sure to bring LOTS of water cause it can get really hot out there!

                                       Stay hydrated!

Other activities at Marked!

There are plenty other activities you can do at marked other than the obstacle course, like:

- Paintball

-Airsoft

-axe throwing

-batting cage

-laser combat

 And plenty other things to do!

This is an incredible place that’s super fun for the older kids (7 and up) and is even fun for the adults. I look forward to going back!

Disclaimer: We were given passes to visit Marked and post a review on the blog. All opinions are my own.