DIY Toys: Fun for Hours!

I got this idea (well kinda definitely copied the idea) from my sister in-law when babysitting her boys a few weeks ago. It’s so simple and so easy to do....and it will entertain your little one(s) for hours!

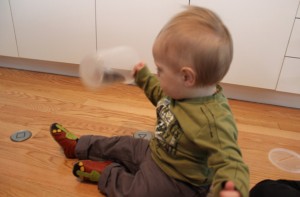
Why wouldn’t it be fun? It clangs, you can shoot the discs across the room on the floor, put the disks in...pull them out, drop them in, shake it about. So.Much.Fun.

Fin agrees.

And I had fun watching him explore and do all the actions listed above, over and over again.

My sister in-law used a Pringles can for hers, and has a TON of the metal disks. She swears her boys, now 3 and 6, have had hours of fun playing with this game. And she has had it around for a few years now...so it’s great for such a wide age range.

Fin is 10 months old, and he had a blast with it all morning (and then later in the afternoon, in case anyone was noticing the wardrobe change). It’s a little early for Fin right now, but I’ve started labeling the disks with numbers and shapes to increase the learning factor.

So, what do you need to put this simple game together?

- 1 container with a Plastic lid (I used a 32oz. Plastic container from Kardish...they’re nice thick and sturdy)

- Tops (and bottoms if you can detach them) from frozen juice concentrates – I have 4 to start but plan on collecting them as I go through juice...it’s a slow process in my house

- Exacto knife

- Cutting board and/or cardboard

- Permanent Marker or stickers (optional)

Putting it all together:

1)Lay the lid for the plastic container on your cutting board or mat and use the exacto knife to cut out a rectangle measuring 3” x 1/2” (just big enough for your juice lids, aka ‘disks’).

2)Separate your metal tops and bottoms from the cardboard juice containers. Use permanent maker (or stickers!) to draw on numbers, shapes, mathematical signs, words, etc.

3)Put the lid on the plastic container.

4)Let your little one play the day away!

Eryn is a mom to a cheerful and energetic little 10 month old boy. She is a Registered Holisitic Nutritionist & accepting new clients . When she's not chasing around a baby or talking nutrition, she enjoys quilting, crafting, cooking & everything in between and blogs about those and other adventures at Bringing Back Handmade.

Enhanced by Zemanta

Make your own snowglobe

by Jayda

Browsing the stores at Christmas I still find myself drawn to the snow globes. There is just something magical about them. Shaking up the sparkly snow and watching it settle brings a warm feeling over me.

My children are not immune to this magic. We could spend a substantial amount of time testing all the snow globes at the store. Their little cherub hands grasp the globe, gently shake it and then they watch, settled on their haunches, in pure amazement as the shimmery particulate falls. They always want to take one home, I usually decline.

The practical side of me feels that this is money we do not need to spend. Plus part of the magic is not having one...

Well, this year we decided to make our own!

Materials:
  • clean glass jar
  • holiday scene (plastic, aluminum or baked polymer clay are ideal for wet environments)
  • snow (large glitter flakes or crushed egg shells)
  • glycerin or mineral oil
  • filtered water
  • glue, waterproof (hot glue, epoxy, fabric)
  • silicon sealant (optional)
Instructions:
  1. Glue (hot glue, epoxy or fabric) the object to the inside of the lid.
  2. Add glitter or shells to form snow and put it in the jar.
  3. Fill the jar with filtered water and glycerin (about 60/40). Allow room for the object, which will displace some of the liquid.
  4. Squeeze a strip of glue or silicone sealant around the threads of the lid.
  5. Screw the lid on tight. Let dry.
Shake, and watch the magic (again and again...)!

Random Snow Globe Facts

  • thought to have originated in France in the 19th century
  • the original snow globe contained a mini Eiffel Tower
  • appear to be the successor of the glass paperweight
  • the glycerin or glycol slows the falling of the snow
  • in modern film and literature, snow globes often symbolize childhood/innocence

Jayda is a recovering academic, living under a co-dictatorship. She blogs about random stuff at MomPhD and nutrition at EatWhole BeVital.

Enhanced by Zemanta

Help for the least-crafty-mom-in-the-universe

by Karen I don't know what happened to me. I grew up with a mom who was a teacher. She was creative and had endless ideas for crafts. I, on the other hand, don't have the first clue where to begin with crafts.

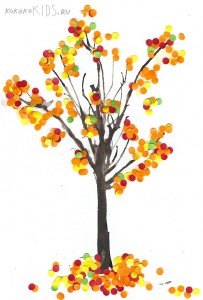
But I recently had an epiphany when Lara made me write about Pinterest. It's actually a never-ending reservoir of ideas - specifically craft ideas! I have a pinboard that I called Crafty Ambitions where I'm storing all the ideas I find that I'm interested in. One that I may try over the holidays is this one - with some modifications to make it more age appropriate for Brandon:

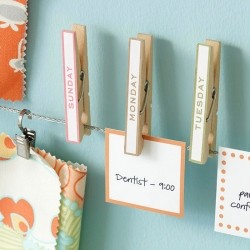
This next pin led me to a site called CraftGawker. Are you the crafty sort? It will blow your mind. Click the link with caution - you've been warned.

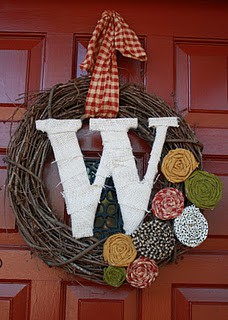
There's so much out there to explore and find. And Pinterest or CraftGawker are much better than going the Google route. I even found some interesting ideas for wreaths. What do you think? (Conveniently, W works for me!)

I'm really looking forward to the holidays so we have a little extra time to try out some new crafts. And I have a few weeks left to find some really fun ones.

What are your crafty secrets? Where do you source your ideas and find projects? What are your favorite materials to work with?

Karen Wilson is a wife to Matt and mom to Brandon (3), who blogs about her life at Karen’s Chronicles. She also explores one of her favourite topics – social media – at her blog, The Media Mesh. You can follow Karen on twitter and find her in other places here.

This weekend:

Don't forget that there are more Santa Claus parades happening and Shopping and Sweets is this Saturday!