Kids' Craft: Bowling at Home

My daughter's been bowling several times now, and loves it! Although she can barely manage to get the ball down the lane, she has a blast knocking over any pins she can. When I noticed empty toilet paper rolls piling up around our house, I questioned my hubby - why weren't they being put in the recycling? He told me he was saving them for a special craft/activity. This is why I love this man - he's the crafty genius in our family!

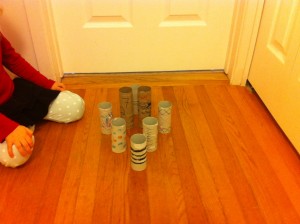
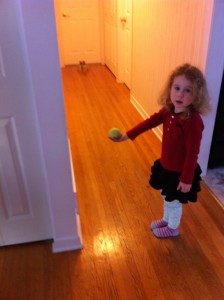
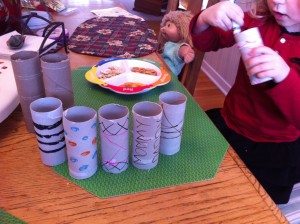
So yesterday evening, the toilet paper roles got decorated with stickers and markers, and were placed at the end  of our long hallway. We started by using one tennis ball as our bowling pin, but discovered that two tennis balls actually worked best :)

bowling 1

bowling 2

bowling 3

A great indoor activity for these cold and snowy days!

GIVEAWAY: Crafts at Tag Along Toys

by Alicia E and I had the great privilege this Spring to visit Tag Along Toys and choose a craft to test out. In Karen's post in March welcoming Tag Along Toys as a Kids in the Capital sponsor, she took some great pictures of the many sections in the store. I was really excited to see the craft section in person and for E to get a chance to choose a craft of his choice.

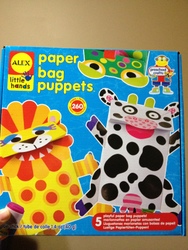
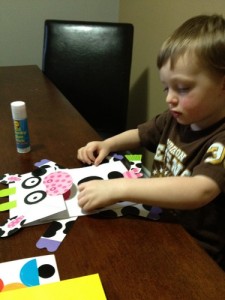
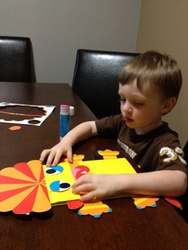
We decided on a paper bag puppet craft kit that was age appropriate for a 3 year old.

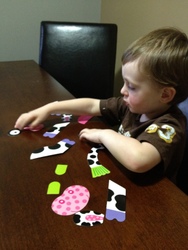
E was super excited to take it home and get started! With a little direction, E went through the steps of gathering the stickers and cut-outs, gluing them on to the paper bag and the best part - creating his very own puppet show!

I highly recommend checking out all the amazing craft kits Tag Along Toys has in stock for children of all ages.  Thank you, Patti, for welcoming us in to your store and offering us this fun opportunity. We will be back soon for some more crafts!

Alicia is a mother of two and blogs at I Found My Feet.

GIVEAWAY DETAILS

Patti from Tag Along Toys has generously given us two Alex Craft kits (ideal for preschool age kids) to give away to our readers!

To enter leave a comment telling us what kind of crafts your kids like to do.  Contest closes on Friday June 15 at 5pm and winners must be able to go to Tag Along Toys (499 Terry Fox Drive, Kanata) to pick up the prize.

Good luck!


Enhanced by Zemanta

Kids Create! March Craft Carnival {GREEN}

by Alicia March 2011 Theme – GREEN

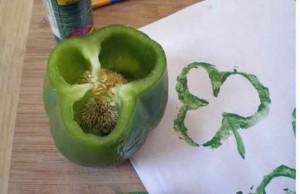
Spring in the air! I think. Let's celebrate March by crafting with our children not only using the colour green (I'm thinking luscious green grass, new green leaves on the trees and St. Patrick' day shamrocks!), but also "going green" by choosing eco-friendly crafts.  I personally like to choose our crafts using recyclables around the house (toilet paper rolls, egg cartons, cardboard boxes) and I always love finding a way to use nature (sticks, leaves, vegetables) in our crafts. How will you craft with the colour green? What does a green theme mean to you?

What is the Kids Create! Craft Carnival? A carnival is a blog article that contains links to other articles covering a specific topic. Think of it as a craft party, where everyone has to show up with a craft based on the same topic. Use this carnival to encourage your family to create crafts and memories together!

Who can participate? All KITC readers! Whether you have a blog or not, we have a way you can participate!

When? Throughout the month you are encouraged to make a craft with your children based on the monthly theme and post your finished project to share with others. Make and share as many crafts as you want according to the theme before the end of the month deadline. Crafts you have made in the past are also welcome, but new crafts are encouraged. Once the deadline has passed we will showcase the crafts and announce the following month’s theme.

Where and how do we post our crafts? There is a link-up widget at the bottom of this post. If you are blogger, post about your craft on your blog and link below to your post. If you do not have a blog, use the KITC Flickr group to upload a picture of your craft (make sure to include your name and a written description of your craft). Read more information here on how to use Flickr and how to join the KITC Flickr Group.

Deadline to submit: Saturday, March 31st

What will your family create?

Thank you to those who participated in last month’s craft carnival! February’s theme was LOVE and KINDESS and we had a few really creative submissions. Check them out!

Alicia is mother to E (2 ¾) and blogs at I Found My Feet.

Enhanced by Zemanta

Arts and Crafts: Making Baby Chicks

by Natasha Rainy days are perfect for making crafts with your little one. This year, we seem to be having more rainy days of summer than hot ones, so Baby H has grown used to seeing the arts and crafts box pop up at least once a week.

A while ago, I came across Frugal Family Fun Blog, a site offering free downloads of craft projects for children. One of the first projects Baby H and I embarked upon was making baby chicks. It’s basically gluing, painting and putting things together.

If you’re looking to do some arts and crafts with your little one, I recommend this easy project.

I pre-cut two circles out of yellow paper, orange triangles for the feet and the beak and cut up the feathers into small pieces. This is to help along with the project, since Baby H - at 22 months old - may lose interest if we spent too much time doing prep work together.

I watched as Baby H glued the  two yellow circles onto a colourful piece of construction paper, a large circle for the body and a smaller one for the head. Next, he painted the body of the chick with yellow paint and set it aside to dry. Once ready, Baby H glued the small bits of feathers and pompoms onto the chick’s body.  He was fascinated by the glue, and was a little too eager to stick everything together. I had to glue on the chick’s legs, feet and beak myself to make sure that they end up in the right places. I didn’t particularly feel like inventing a new brand of birds and explaining the modified chick to my son later on.

Baby H helped  glue the remaining parts and the googly eyes, which he kept giggling at.  At the end of it all, my son had learned a few new things, made himself a chick and I got to spend some time with him on a rainy Saturday afternoon.

Arts and crafts are really important to me, and I think all of us really, because they help us see the artistic potential of our children early on.  And once in a while, it’s fun to do something really messy and end up stuck to all sorts of things.

Natasha is a new mommy to her first born, Baby H. She runs ShopHaven, a blog that reviews products and profiles local businesses and individuals from the Ottawa area. Natasha is also the creative force behind ShopHaven Baskets; a highly customized gift baskets service.

Enhanced by Zemanta

Tea for Two

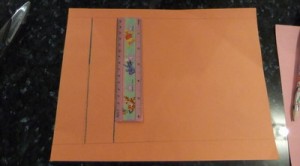
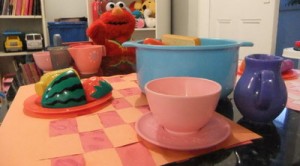
by Josée B.G. and I wanted to do something crafty the other day, but our craft supplies were low. We decided to make some paper placemats that would be perfect for playing tea party. The only supplies required are two pieces of cardboard per placemat, scissors, glue, and something to decorate the placemats with.  If you like perfectly straight lines you'll also need a ruler.

We started by drawing designs on our cardboard. You can get really creative here, just keep in mind that you'll be cutting both pieces of cardboard.

I then used a ruler to draw parallel lines along the width of the first piece of cardboard, stopping the lines about 1" from either edge:

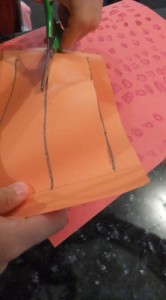
B.G. was able to cut along the lines once I started her off. Make sure not to cut right to the edge of the paper or you'll have to do a bit of a fix with some tape!

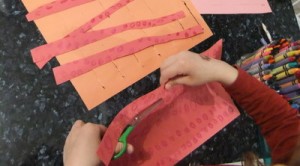
Cut the second piece of cardboard lenghtwise into strips. I didn't bother drawing lines for B.G. to follow; curvy strips actually create a nice effect, and you won't need every strip for the finished placemat, so there's room for error.

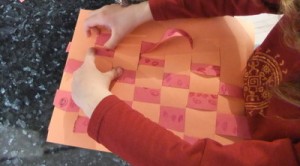
Using a basket-weave pattern, weave the strips into the first piece of cardboard:

We used glue to glue down the end pieces on both sides of the placemat, but tape would work equally well.

Once the glue dries, you've got colorful placemats for tea time!

Josée is mom to four-year old daughter B.G., and two-year old son Bonhomme.  She is always searching for fun and frugal Ottawa events and activities, and puts her research to good use at her website, www.frugalfunottawa.ca.

Enhanced by Zemanta