Rice Sand Box

by Erin

The end of outdoor sandbox weather is sadly on it's way.  Here's an idea on how to keep sandbox fun going all year round.

Making the rice

Just a quick note: we are using rice and food colouring for this project. Both are non-toxic and edible, although young children should still be monitored since ingesting even a few tablespoons of uncooked rice can be dangerous. A few grains won't harm anyone, though.

Get some rice - LOTS of rice. I only used 4 x 600g bags, but for a "sandbox" you'll need 10-15 times that. I suggest you go to Costco.

You'll want about ¾ of a bottle of food colouring for every 500g of rice. The more food colouring you use, the brighter and deeper the colours you'll wind up with - if you want muted pastels, use ½ a bottle or less. You can also mix the food dye for custom colours, you're really only limited by your imagination and your patience. For this sample, I used the Neon stuff.

Rice Sandbox1
Rice Sandbox1

Essentially, we'll be combining the food colouring with the (uncooked) rice and kneading it to spread it through as many of the grains as possible. A plastic zippered food storage bag comes in VERY handy for this step.

Rice Sandbox2
Rice Sandbox2

TIPS:

  • Adding the food colouring to the bag before adding the rice makes it easier to get good coverage (as opposed to what is shown in my image).
  • Dye the rice in small batches, DO NOT overfill the zippered bag.
  • Dollar store zippered bags won't cut it for this activity, you'll need something sturdier.
  • Allow rice to dry completely before touching it with bare hands. The food dye will come off on your fingers and stain your clothes.
Rice Sandbox3
Rice Sandbox3

Repeat this procedure as necessary. You'll want to use a fresh zippered bag for each batch. You might want to consider dyeing ½ the rice and leaving the rest un-dyed, for the sake of saving some time, and your sanity.

Containing the rice

Rice Sandbox6
Rice Sandbox6

So now that you have made a rainbow of rice grains, dump any un-dyed rice into the bottom of a large, shallow plastic storage container. I like the ones designed for underbed storage because they have little casters making set up and put away easier on my back. Next, add all the coloured rice, you can either dump it all in, or you can artistically arrange it, as I did in the sample container.

Rice Sandbox4
Rice Sandbox4

Playing with the rice

I set the sandbox up with typical toys: shovel, pail, dump truck, animal figurines. The toys you add will depend on the age of the child(ren) playing in the sandbox.

Obviously, the colours will not stay separated, but we're not creating an art installation here. Unless that's what you really want, in which case, place your container out of the reach of children, and cats. Seriously about the cats, you do not want to ever leave the sandbox uncovered and unattended. Trust me.

After playtime is over, you will have to vacuum up some stray rice grains.

Rice Sandbox5
Rice Sandbox5

Reserve a half cup of each colour to use in future art projects - think glitter, but WAY less messy.  I have another post coming soon on what you can do with this batch of rice.

UPDATED TO ADD: "I found out that you can add a few teaspoons of rubbing alcohol to the food colouring to make kneading it through the rice grains easier. It also decreases the drying time before you can play with the rice without danger of staining your fingers and/or clothing."

Erin Marshall is an Angel Mama and a SAHW. Two days a week she uses her Amazing Auntie super powers to keep up with her 20-month old nephew, Xavier; the rest of her time is split between being an editor/proofreader, artist and blogger. 

Enhanced by Zemanta

Pinteresting my way through summer vacation

by Lara I'm not always the most creative when it comes to finding activities for the kids.  With them home with me full time this past week I have leaned heavily on Pinterest for indoor activities.

What I love about so many of the pins is that just a photo of an activity idea is often enough for me to run with it (psa: when pinning, remember to pin to the URL to the exact post you're referring too.  Too often I click through to a front page of a site and can't find anything about what I thought I was clicking through to see).

Here a couple of the crafts we tackled this week:

Ours may or may not have turned out as nicely as those photos ;)

This particular pin has me inspired to maybe tackle a bigger project next week:

And in case you didn't know, Kids in the Capital has it's own Pinterest account where we try to share all things kids.  Come on over and join us!


Leave a comment sharing what some of your favourite kid activity pins have been lately!


Enhanced by Zemanta

More Eco-friendly ideas from Pinterest!

by Gwen My love of Pinterest continues! It is such a great spot to see the many things others are sharing and pinning that I would not have otherwise seen. If you haven't joined yet, try it out! It may quickly become the way you choose to spend most of your spare time :)

Here are 3 of my faves from the past week: 

How to deodorize your home naturally - Any time you have an unpleasant scent in your home—fish from last night's dinner, burned food odour...you want to get rid of the smell fast. This is a natural way to freshen up and make your place smell amazing. Image credit: One More Moore

Avocado-Chocolate Pudding Recipe - I have personally made this dessert and it is delicious! So delicious that you won't believe it is actually good for you. Avocados are super healthy and super delicious and serve as the base ingredient in this delicious treat. Image credit: Forgiving Martha

Walnut Boat Craft - Spring is in the air which means plenty of rainy days and plenty of puddles to play in. The kids will love this simple craft made out of empty walnut shells, toothpicks and a few other items you most likely have around your home. Play with the boats in puddles or indoors. Image credit: hiphiphoorayblog.com

Check out my last set of eco-friendly Pinterest picks where you will learn How To Make Reusable Non-Toxic Dryer Sheets and More

Do you have a favourite eco-friendly pin? If so, please share it in the comments! 

Gwen is a mom of 2 and owns/operates Nayla Natural Care, an online store that specializes in carrying the best organic, natural and eco-friendly products.

Enhanced by Zemanta

Beading with kids

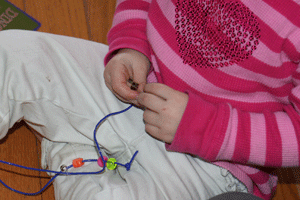
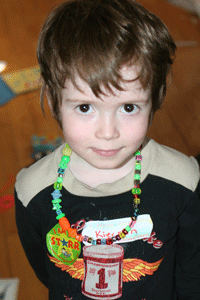
by Lara I'll readily admit that at a few months shy of three I didn't think my twins were ready to start making necklaces with beads - which is where I apparently wasn't giving them enough credit. They came home with some fun necklaces for the sitter's one day and I realized what a great activity making necklaces was for home too.

What you need:

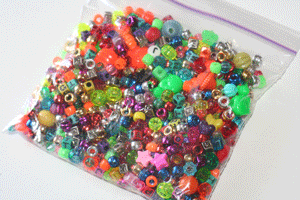
- beads with a big opening (we have a big mix that came from garage sales and past crafting adventures my sister had, but you can easily get them at any craft store)

- something to thread the beads onto.  Yarn works with tape wrapped around the end to make it easier to thread into the beads. I also find gimp/plastic lace works really well

- Patience (the necklaces don't tend to get finished in one go and sometimes it's a lot of fun to throw the whole pile of beads on the floor and watch your mother's head explode)

It's a great activity that is fabulous for practicing hand eye coordination and the kids have a fun necklace to show off and play dress up with later.

Have you tried making necklaces with your kids?

Lara is mom to five year old Kiernan and two and a half year old boy/girl twins Quinn and Juliette.  Between the kids and her social media consulting business, she spends most of her time running frazzled.

Enhanced by Zemanta

Making Treats For The Birds

by Nicki Having grown up in a rural area, with nature loving parents and grandparents, feeding the birds was just something that we did.  My mom still has numerous bird feeders that she keeps filled and between her and my grandfather, her father, can identify just about any bird that flies into their yard.  They both loved teaching us kids about the birds that visited. 100_3033 Living in a rural part of Ottawa, I now have followed in my mother's footsteps, I usually have three feeders hanging my yard for the winter, Liam and spend lots of time sitting at the dining room window, watching the birds nibble at the seeds we put out for them.  Liam was thrilled to get his very own bird feeder as a Christmas gift from my aunt and uncle! 100_3036 This past fall, on a blustery, cold day when Liam insisted on going out side to play, he discovered the pine tree at the end of our front yard.  And the discovered treasures . . . pine cones!  In typical little boy fashion, he NEEDED to collect as many as he could and thought that they all needed to come into the house.  We agreed (and by agreed I told him) that we would bring them in but not to play with.  We would save them for the winter and make treats for the birds with them.

So, when he found the bucket of pine cones not long ago, how could a resist when he asked to make treats for his birds.  We spent a fun filled, messy hour making these tasty bird treats!

Unfortunately, we didn't get to see the birds munching on these, there were signs that they had been eating seeds when we weren't looking and then a silly squirrel (well, we are assuming it was a squirrel by the foot prints in the snow) stole them all!  But, I guess squirrels need treats sometimes too!

Pine Cone Bird Treats 100_3011 Materials:

pine cones, peanut butter, bird seed, string 100_2998

Directions:

1. Attach a string for hanging to pine cone.

2. Spread peanut butter over the pine cone. 100_3006 3. Dip pine cone in bird seed. 100_3008 4. Hang outside for birds to nibble. 100_3018

*****  For those of you who may have a peanut allergy in the family, you can substitute lard, shortening or any other spreadable, edible product for peanut butter!***


Nicki is mom to 3 year old Liam.  She is an ECE,  who loves to garden, scrapbook, write and take photos. She blogs about the randomness that is her life at Perils of a Working Mom